Hello

Hello
A magical place

Tuesday, June 27, 2017

How to Can Tomatoes

How to Can Tomatoes

how-to-can-tomatoes
With canned tomatoes, enjoy that garden-fresh tomato taste in sauces, soups and stews all year long! Here’s how I can tomatoes:
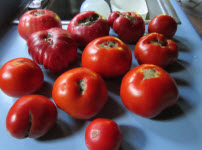
First, when it comes to canning tomatoes for the rest of the year, I like to let my tomatoes get super-ripe on the vine. Farmers really don’t have this luxury as the fruit becomes too easy to bruise at this stage. However, tomatoes will continue to ripen in the box or on the counter, so it’s best to purchase your canning tomatoes a few days in advance of the processing.
I also like to incorporate other flavors with my tomatoes because it is only in the summer that I have access to fresh basil, oregano, thyme and garlic.
Canning Supplies for Canning Tomatoes

  • Super-ripe tomatoes, fresh herbs, extra-virgin olive oil, onions, red peppers, salt
  • Heavy cooking pot with boiling water, pan of cold water
  • Slotted spoon
  • Knife and cutting board
  • Small chopper or food processor for garlic
  • Canning jars and lids (as many as needed), screw band, cloth to wipe the jars, jar tongs
  • Funnel and ladle
  • Marker to label cans

Preparation for Canning Tomatoes

I place some extra-virgin (organic) olive oil to thoroughly cover the bottom of a heavy cooking pot. I then take a few onions and a red pepper and cut them into smallish pieces and drop them into the pot. Adding a dash of salt, I let these cook until they are soft.
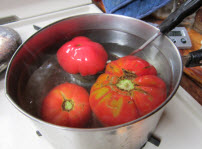
While the onions and pepper are cooking, I set a pot of water to boil as I wash the tomatoes. Then, using a slotted spoon, I dip the tomatoes (maybe three or four at a time) into the boiling water until the skins slip or about 30 seconds. Removing them with the spoon, they immediately go into a pan of cold water. They are then placed on a clean countertop while I do the rest of them. Once all the skins are loose, I cut out the stem and tough part of the inside and pull off the skin. Placing the tomato on a cutting board, it gets cut into small pieces.
This, of course, is the “proper” way to cut up the tomatoes, but I often do the “Lucy” (more fun) version. Making sure that I have clean hands, I stand above the compost bucket, pull off the skins and mush the tomatoes into the pot with my hands and through my fingers (reserving the stem and tough interior). This tactile experience is quite exhilarating.
Stirring frequently, I slowly add all of the tomatoes to the pot. I then wash several bunches of basil, oregano and thyme and peel quite a few cloves of garlic. Using a garlic press, a small chopper or a food processor, the garlic gets diced into very small pieces and added to the mix. The other spices then get torn into small pieces and also tossed into the pot. The mix is now ready to cook for about an hour in order for all of the flavors to blend together.
It’s important to be sure that this blend remains mostly tomatoes. We want the mix to be acid in order to be able to preserve it properly. Also—stay away from low acid tomatoes (a few are fine, but not too many).

How to Can Tomatoes

Wash the canning jars and lids and place aside. Jars get used year after year, but lids can only be utilized once. Fill a canner ¾ full of water and set on the stove to boil. Line up the jars and put 1 teaspoon salt in the quarts or ½ teaspoon of salt in the pints (salt, like sugar, is a preservative).
Once the water is boiling, we are ready to continue. I use a funnel over the top of the jar when I ladle my special mixture into it. Be sure to leave 1 inch of head space at the top. Next comes a VERY IMPORTANT step—it’s absolutely critical to wipe off the top of the jar with a cloth before putting on the lid. Any tiny particle of food left on the rim will cause a jar to not seal. Pop on the lid, adjust the screw band (tightly) and place in the water bath with jar “tongs”.
Make sure that everything continues in a soft boil and that there is at least 1 inch of boiling water above the top of the jars. Put the cover on the pot and start timing the processing; 40 minutes for pints and 45 minutes for quarts. A small battery timer is handy for this. After cleaning up the accrued dishes, I take a break and read while my jars are dancing away.
Once the timer dings, I turn off the stove and very carefully take the top off of the pot so that the steam goes away from me. With a nice trivet on the table or counter nearby, I slowly take out each jar (again with the “tongs”) and place it to cool. Be sure that the trivet is not located in a draft as a cold breeze can crack the jars at this point. This is also why I move them slowly.
Once all of this has been accomplished, I generally call it a day. There will be a noticeable (and reassuring) “pop” as the individual jars seal. I look lovingly at my beautiful trivet of summertime bounty and I wait until the next day to finish the job.
The jars are cool by morning. I take off the screw bands (carefully) because they sometimes get food on them and leaving them on makes them rust. They get washed and put aside for next year. I label each and every lid (this way you won’t have to scrub any labels off of the jar because the lid gets tossed anyway) with the year and the contents. Into the pantry go the canned tomatoes to await use in canned tomato soup, stews, American chop suey (I cook the elbows right in the mix) or anything else I decide to make during the long winter months. Yum!
If you need more advice on how to can your vegetables, or are looking to can more than just tomatoes, try our vegetable canning guide. If you feel that you’d rather dry your tomatoes than can them, learn how here. Whatever you choose, good luck making the most of your tomato harvest!
celestes-garden-delights-652x1024.jpg
Have more information and a detailed, how-to guide for living a sustainable and independent life at your fingertips. Celeste’s “Celeste’s Garden Delights” provides step by step information on gardening, canning, freezing, drying, fermenting, backyard chickens and so much more! From a satisfied customer “I was privileged to be at your lecture at Debra’s. I have already shared your book with others and find it on par with Crockett’s Victory Garden (my bible) for help with planting and in a category all its own for all other aspects of healthy living.” –Lee Edmands

About This Blog

Celeste Longacre has been growing virtually all of her family’s vegetables for the entire year for over 30 years. She cans, she freezes, she dries, she ferments & she root cellars. She also has chickens. Celeste has also enjoyed a longtime relationship with The Old Farmer’s Almanac as their astrologer and gardens by the Moon. Her new book, “Celeste’s Garden Delights,” is now available! Celeste Longacre does a lot of teaching out of her home and garden in the summer. Visit her web site at www.celestelongacre.com for details.
http://www.almanac.com/blog/gardening/celeste/how-can-tomatoes?trk_msg=MSVULP301MOKNEAC5PQLIGFJ40&trk_contact=EEBLFVJ2I0VAQT9EM5JFVJAK9O&trk_sid=3AJO88LO0L6S5CGQRUSEAL31UO&utm_source=Listrak&utm_medium=Email&utm_term=How+to+Can+Tomatoes+(title)&utm_campaign=Companion+Daily

Thursday, June 22, 2017

Rhubarb Pie

Rhubarb Pie
The rhubarb is going nutters here, as it always does this time of year. That said, folks still seem unfamiliar with your basic rhubarb pie. Eyed with suspician, it disappears quickly after the first bite!
Rhubarb pieIngredients:
  • 4 cups rhubarb stems, chopped into 1" pieces
  • 1 1/3 cups white sugar
  • 1/3 cup all-purpose flour
  • 1-2 tablespoon butter
  • 1 recipe pastry for a 9 inch double crust pie
Directions:
  1. Preheat oven to 450 degrees F (230 degrees C).
  2. Combine sugar and flour. Mix well with rhubarb pieces. Heap rhubarb over bottom layer of pie crust in pie plate. Dot with small pieces of butter. Cover with top crust. (OR roll first layer of pie crust out to about a 12 in round, and fold edges over filling for a rustic looking pie.
  3. Place pie on lowest rack in oven. Bake for 15 minutes. Reduce oven temperature to 350 degrees F (175 degrees C), and continue baking for 40 to 45 minutes. Serve warm or cold.
  4. Don't be shy about adding other fruit like the classic strawberries, or blueberries like I did in the photo. Blackberries and peaches also sound delicious to me!

Dill Planting, Growing, and Harvesting Dill

Dill

Planting, Growing, and Harvesting Dill
Dill is an annual, self-seeding plant with feathery green leaves. It is used most commonly in soups and stews and for pickling. Dill weed is easy to grow and attracts beneficial insects such as wasps and other predatory insects to your garden.
If you’re planting dill for pickling, plant every few weeks into midsummer to ensure a constant supply!
To create a permanent dill weed patch, allow some of the seeds to self-sow each year—you’ll have plenty of early dill to start the season.

Planting

  • Sow dill seeds about ¼-inch deep and 18 inches apart in rich soil, then gently rake the seeds into the soil. The soil should be between 60 and 70ºF for best results.
  • Dill weed does not grow well when transplanted, so start the seeds fresh in the garden in early summer. Make sure to shelter the plants from strong winds.
  • After 10 to 14 days, the plants should appear in the soil. Wait another 10 to 14 days, then thin the plants to about 12 to 18 inches apart.
  • In your garden, plant dill next to cabbage or onions, but keep it away from carrots.

Care

  • Water the plants freely during the growing season.
  • In order to ensure a season-long fresh supply of dill, continue sowing seeds every few weeks. For an extended harvest, do not allow flowers to grow on the plants.
  • If the soil remains undisturbed throughout the growing season, more dill plants will grow the next season.

Pests/Diseases

  • Leaf spot and occasionally a few other types of fungal leaf and root diseases

Harvest/Storage

  • As soon as the plant has four to five leaves, you can start harvesting. Pinch off the leaves or cut them off with scissors.
  • If you have a lot of plants, you can pinch off entire stalks.

Recommended Varieties

Wit & Wisdom

For sweeter breath, chew dill seeds.
For pickling, grow your own cucumbers!

Recipes

Cooking Notes

Many people love to make dill pickles with their fresh dill. Learn how with our tips and recipes for dill pickles or our video on making dill pickles. You can also add dill as a seasoning in countless recipes.                            http://www.almanac.com/plant/dill?trk_msg=P0CEEUB52SL4N4TNPS6PPM29O0&trk_contact=EEBLFVJ2I0VAQT9EM5JFVJAK9O&trk_sid=0NB2SJK3MJLG2LKR3Q3ALFB97K&utm_source=Listrak&utm_medium=Email&utm_term=Dill+(title)&utm_campaign=Companion+Daily

Tuesday, June 20, 2017

Growing Tomatoes

Our Guide to Growing Ribbon-Worthy Heirloom Tomatoes

Heirloom tomatoes provide far superior flavor than their store-bought counterparts. You're sure to find some of the best-tasting heirloom tomatoes you've ever had in this list of our favorite varieties.
What is an heirloom tomato? Many gardeners have heard the term but don't really know what it means. Happily, it's an easy definition: a variety that has been passed down from gardener to gardener. Unlike modern hybrid varieties, heirloom tomatoes come true from seed, making them easy to share.
The main reason to choose heirloom tomato varieties is the flavor. There's no one taste; you'll find a wide range of flavors in the heirloom-tomato world. But many of these varieties are prized for having an old-time taste—they're a far cry from tomatoes at the grocery store, or even from many modern hybrids like 'Better Boy' or 'Early Girl'.

Inspirational

Fair and green is the marsh in June;
Wide and warm in the sunny noon.
The flowering rushes fringe the pool
With slender shadows, dim and cool
.
–Antoinette Alcott Bassett

Thursday, June 15, 2017

Astilbe How to Plant, Grow, and Care for Astilbe

Astilbe

How to Plant, Grow, and Care for Astilbe
Astilbe is a perennial with beautiful, showy flowers atop glossy, fern-like foliage. Here’s how to grow and care for astilbes in your garden.
Astilbes’ flower clusters vary in size from 6 inches to 2 feet and their height ranges from 6 inches to 5 feet, depending on the variety.
If you have a shady area, try astilbes. They are a great way to add color and texture to a place where other flowers won’t thrive.

Planting

  • Astilbes prefer a site that receives light to moderate shade; they will burn in full sun.
  • Astilbes prefer soils that provide average to slightly below average moisture. Make sure your soil drains well and does not puddle or get water-logged in rain. Amend soil, especially clay types, with peat moss, perlite, and coarse sand to improve the drainage. 
  • You can plant astilbe seeds, but they are short–lived and difficult to germinate. It is easier to plant divisions from other astilbe plants.
  • Plant divisions in the spring or fall about 1 to 3 feet apart, depending on the type.
  • If you are planting bare-root plants, make sure the holes are twice as wide as the plants and 4 to 6 inches deep. Place the plants so that the roots are fanned slightly and pointing downwards, with the crown planted 1 to 2 inches below the ground level. Cover the roots with soil and press firmly.
  • Make sure to plant the divisions in consistently moist, humus-rich soil. Dry soil can be fatal to your plants.
  • To prolong the foliage, provide shade from hot afternoon sun. Astilbes can grow in deep shade, but will not flower as much.

Care

  • Remember to regularly check your astilbes to make sure they are moist. Water accordingly if rain does not occur. It’s best to water deeply when you water (not everyday sprinkling).
  • Astilbes spread quickly and form broad clumps. Their crowns often rise above the soil as they grow, so make sure to cover them with humus-rich soil or lift and replant the clumps.
  • Your astilbes will benefit from a balanced organic fertilizer applied in the spring. (Learn more about soil amendments here.)
  • Be sure to divide the overgrown clumps every 3 to 4 years in the spring. You can either replant the divisions immediately or put them in pots to be planted out in the early summer when they are re-established.
  • Astilbe do fine as cutting flowers if you wish to clip some blooms to bring inside.
  • Removing the flower heads will not promote continued flowering. 
  • After blooming has finished for the season, feel free to clip off any spent flower stems. Your astilbes will continue to provide attractive foliage until fall.
  • After the first frost, the leaves may yellow; trim leaves if you wish and fresh growth will come next spring.

Pests/Diseases

Recommended Varieties

Wednesday, June 14, 2017

Garlic


Garlic


Planting, Growing, and Harvesting Garlic

Growing Garlic (U.S.)
Garlic is easy to grow and produces numerous bulbs after a long growing season. Plus, it’s frost tolerant! Here’s how to grow garlic in your garden.
Beyond its intense flavor and culinary uses, “the stinking rose” is good in the garden as an insect repellent and has been used for centuries as a home remedy.

Planting

  • Garlic can be planted in the spring as soon as the ground can be worked, but fall planting is recommended for most gardeners. Plant in the fall and you’ll find that your bulbs are bigger and more flavorful when you harvest the next summer.
  • In areas that get a hard frost, plant garlic 6 to 8 weeks before that frost date. In southern areas, February or March is a better time to plant.
  • Break apart cloves from bulb a few days before planting, but keep the papery husk on each individual clove.
  • Plant cloves about one month before the ground freezes. 
  • Do not plant cloves from the grocery store. They may be unsuited varieties for your area, and most are treated to make their shelf life longer, making them harder to grow. Instead, get cloves from a mail order seed company or a local nursery.
  • Ensure soil is well-drained with plenty of organic matter. Select a sunny spot.
  • Place cloves 4 inches apart and 2 inches deep, in their upright position (the wide root side facing down and pointed end facing up).
  • In the spring, as warmer temperatures come, shoots will emerge through the ground.
  • See more information about how to plant garlic in the fall.

Care

  • Northern gardeners should mulch heavily with straw for overwintering.
  • Mulch should be removed in the spring after the threat of frost has passed. (Young shoots can’t survive in temps below 20°F on their own. Keep them under cover.)
  • Cut off any flower shoots that emerge in spring. These may decrease bulb size.
  • Weeds should not be a problem until the spring. Weed as needed.
  • Garlic requires adequate levels of nitrogen. Fertilize accordingly, especially if you see yellowing leaves.
  • Water every 3 to 5 days during bulbing (mid-May through June).
  • A note on garlic scapes: Some folks love cooking the scapes (the tops of hardneck garlic). Whether you trim the scapes or let them keep growing is your preference. We like to stir fry scapes the way we cook green beans—similar, with a spicy kick!

Pests/Diseases

Garlic has very few problems with pests in the garden (in fact, its a natural pest repellent!), and also very few problems with the diseases that plague other veggies. White Rot is one concern, but you should also keep an eye out for the same pests that plague onions.
  • White Rot is a fungus that may attack garlic in cool weather. Not much can be done to control or prevent that problem except rotating your crops and cleaning up the area after harvesting. The spores can live in the soil for many years. The fungus affects the base of the leaves and roots.

Harvest/Storage

  • Harvest time depends on when you plant, but the clue is to look for yellow tops. Harvest when the tops begin to yellow and fall over, before they are completely dry.
  • In Northern climates, harvesting will probably be in late July or August. In Southern climates, it will depend on your planting date.
  • Check the bulb size and wrapper quality; you don’t want the wrapper to disintegrate. Dig too early and the bulb will be immature. Discontinue watering.
  • To harvest, carefully lift the bulbs with a spade or garden fork. Pull the plants, carefully brush off the soil, and let them cure in an airy, shady spot for two weeks. We hang them upside down on a string in bunches of 4 to 6. Make sure all sides get good air circulation.
  • The bulbs are cured and ready to store when the wrappers are dry and papery and the roots are dry. The root crown should be hard, and the cloves can be cracked apart easily.
  • Once the garlic bulbs are dry, you can store them. Remove any dirt and trim off any roots or leaves. Keep the wrappers on—but remove the dirtiest wrappers.
  • Garlic bulbs may be stored individually with the tops removed, or the dried tops may be braided together to make a garlic braid to hang in the kitchen or storage room.
  • Bulbs should be stored in a cool (40 degrees F), dark, dry place, and can be kept in the same way for several months. Don’t store in your basement if it’s moist!
  • The flavor will increase as the bulbs are dried.
  • If you plan on planting garlic again next season, save some of your largest, best-formed bulbs to plant again in the fall.

Recommended Varieties

http://www.almanac.com/plant/garlic?trk_msg=NL0NQBQ4TMDKJCLU5H1N40H07C&trk_contact=EEBLFVJ2I0VAQT9EM5JFVJAK9O&trk_sid=UEPJRRJD24EPEQEL5SNN5QS450&utm_source=Listrak&utm_medium=Email&utm_term=Garlic+(title)&utm_campaign=Companion+Daily

Tuesday, June 13, 2017

How to Root Hydrangeas from Cuttings Easily

How to Root Hydrangeas from Cuttings Easily

Are you one of many that would love to know how to grow hydrangeas from cuttings?
You’ll be so glad you found us as we have compiled a very informative post that steps you through the process.
If you love Hydrangeas, now you can grow your own! They will add a splash of color to your garden and they look stunning. Learn how to grow them from cuttings quickly and easily. We also show you how to change the color by altering the Soil PH Level.
Hydrangea Tutorial
Hydrangeas are a beautiful flowering plant that is deciduous. They can range in size from smaller style bushes to the larger tree-like varieties. If you want to know how to grow hydrangeas, you can create new specimens from cuttings.
There are a number of different methods that can be used dependent on whether or not you have a ‘Mother Plant’ but we will step you through a very easy way to create your own.
How To Root HydrangeasFirstly we will start by selecting your cutting. You will need to brush away mulch and soil from the base of the back or side of a mature hydrangea plant. Now look for a non-flowering shoot. The ones to grab are those that have 2 to 3 pairs of leaves. You should also be looking for a cutting that is at the base of the plant.
Remember, the more woodier the cutting, the more roots they will produce. Your cuttings should be 5-6 inches long (12-15 cm’s). Another good tip is to take cuttings in the morning. It is also recommended that you don’t take cuttings if the leaves are wilted.
How To Root Hydrangeas From Cuttings-:
We have found an excellent video that runs for a bit over a minute. The Grumpy Gardener shows you how to get 5 additional plants from one. Click Play above to view ⇑
How to Grow HydrangeasFrank from Nantucket Hydrangeas has a very informative blog that gives great information when striking your Hydrangeas. He steps you through the process and even includes some common trouble-shooting. For example, even if your leaves fall off you should not give up. The buds will sprout provided the stem is still intact. He also warns you to watch out for Slugs. According to Frank, they can wreak havoc on small plants. If you burn your leaves, he suggests that you cut them back, just beyond the discolored area. Another great tip is if your stems look as though they are beginning to rot, dry them up by watering less – A myriad of further information can be found on Franks Blog but while you’re here you may like to check out another popular post –how to change the colour of hydrangeas.
How to change the colour of Hydrangeas

http://thewhoot.com.au/whoot-news/diy/grow-hydrangeas?omhide=true

Mint Planting, Growing, and Harvesting Mint


Mint


Planting, Growing, and Harvesting Mint
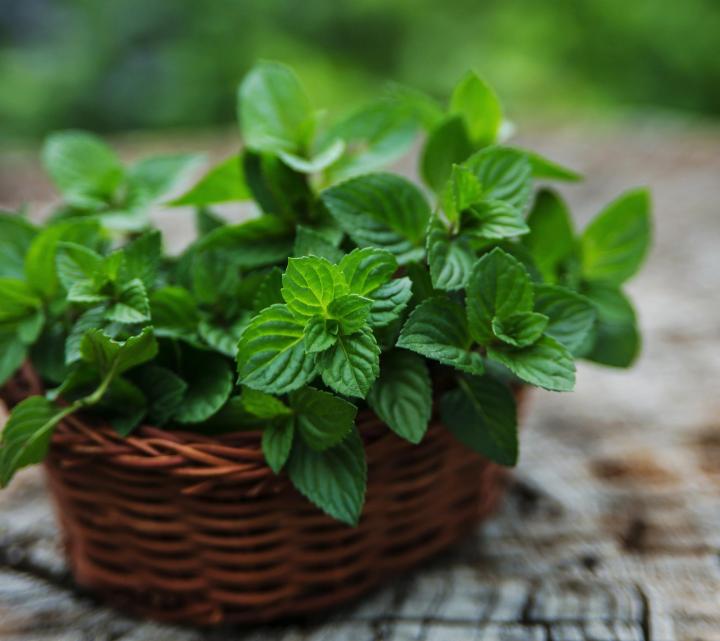
Mint is a perennial with very fragrant, toothed leaves and tiny purple, pink, or white flowers. It has a fruity, aromatic taste.
There are many varieties of mint—all fragrant, whether shiny or fuzzy, smooth or crinkled, bright green or variegated. However, you can always tell a member of the mint family by its square stem. Rolling it between your fingers, you’ll notice a pungent scent and think of candy, sweet teas, or maybe even mint juleps.
As well as kitchen companions, mints are used as garden accents, ground covers, air fresheners, and herbal medicines. They’re as beautiful as they are functional, and they’re foolproof to grow, thriving in sun and shade all over North America. In fact, mint can be vigorous spreaders, so be careful where you plant it.

Planting

  • Mints are vigorous perennials that thrive in light soil with good drainage.
  • Ideally, they prefer a moist but well-drained site, something like their native habitat along stream banks.
  • Most will tolerate some shade, and the variegated types may require some protection from direct sun.
  • For growing outdoors, plant one or two purchased plants (or one or two cuttings from a friend) about 2 feet apart in moist soil. One or two plants will easily cover the ground. Mint should grow to be 1 or 2 feet tall.
  • For the best growth in confined areas such as containers, topdress plants with a thin layer of compost or organic fertilizer every few months. Aboveground pots will need winter protection in cold climates.
  • In the garden, plant mint near cabbage and tomatoes.

Care

  • Minimal care is needed for mint. For outdoor plants, use a light mulch. This will help keep the soil moist and keep the leaves clean.
  • For indoor plants, be sure to water them regularly to keep the soil evenly moist.
  • At first, mints develop into well-behaved–looking, bushy, upright clumps, but they soon set out to conquer new territory with horizontal runners and underground rhizomes. Unless you block the advance, a pert peppermint plant can turn into a sprawling 4-foot giant in just 1 year. It’s not the stuff of horror movies, however. Mints benefit from picking and pruning. They are shallow-rooted and easy to pull out, so there’s no reason to worry, as long as you provide physical barriers such as walls, walkways, or containers.
mint-basket_full_width.jpg
Photo Credit: Juta/Shutterstock

Pests/Diseases

Harvest/Storage

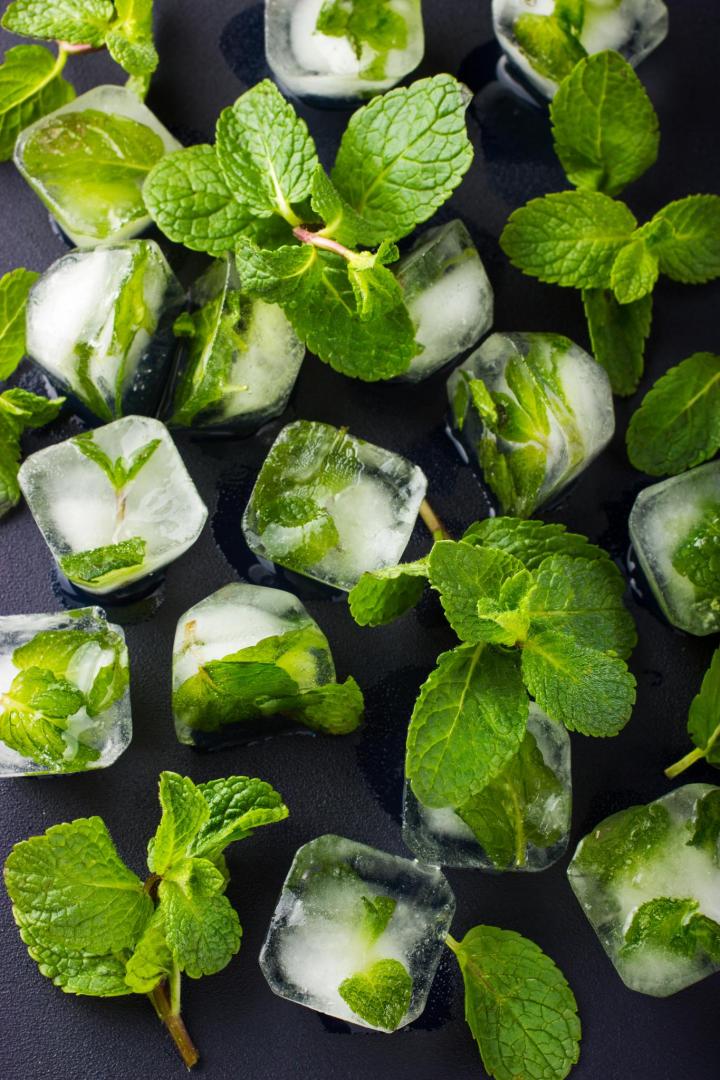
  • Frequent harvesting is the key to keeping mint plants at their best. Young leaves have more flavor than old ones, and mint can be harvested as soon as it comes up in spring. Although fresh is best and sprigs keep for a few days in water, mint leaves can be frozen or air-dried in bunches.
  • Right before flowering, cut the stems 1 inch from the ground. You can harvest one mint plant two or three times in one growing season.
  • You can also just pick the leaves as you need them.
  • You can grow the plants indoors for fresh leaves throughout the winter. If you want to dry them, it’s best to cut the leaves right before flowering. Store the dried leaves in an airtight container.

Propagating Mint

The best way to propagate mints is by taking cuttings from those that you like best. It’s easy—take 6-inch cuttings of rooted stems and plant them horizontally in the soil. Mint stems will also root in a glass of water. Start with a small cutting from an established plant. Any gardening friend will give you a cutting of a favorite mint.
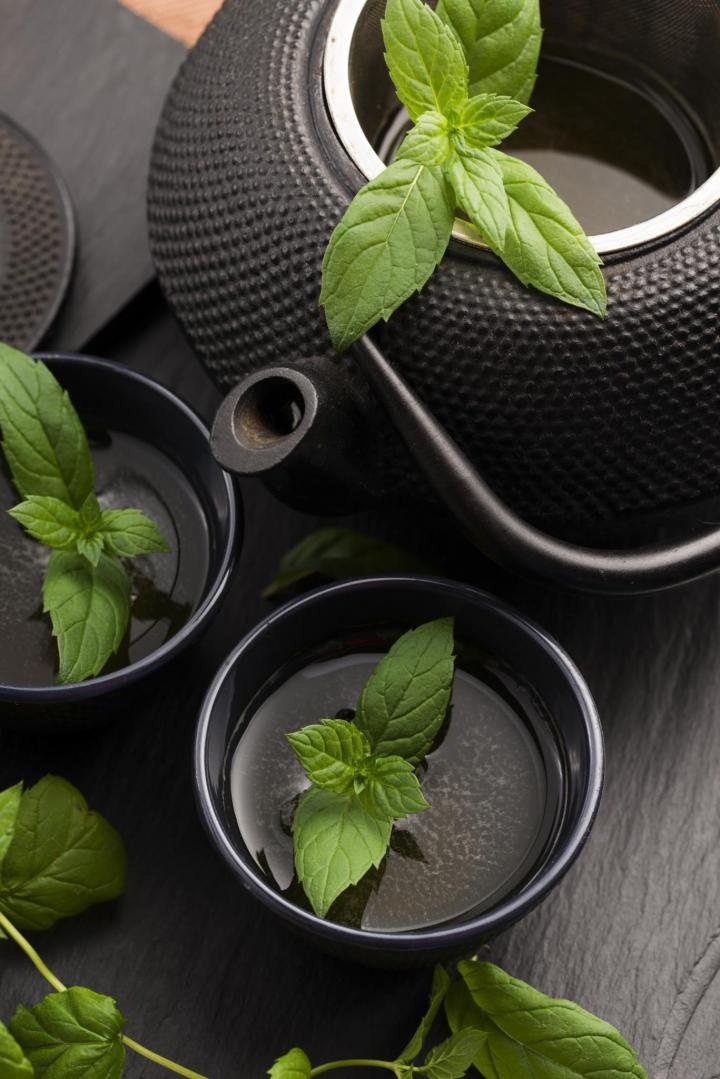
mint_tea_full_width.jpg
Photo Credit: Joannawnuk/Shutterstock

Recommended Varieties

Wit & Wisdom

“If any man can name … all the varieties of mint, he must know how many fish swim in the Indian Ocean.”  –Walafrid Strabo (c. 808–849)

Recipes

Cooking Notes

Serious cooks generally prefer spearmint for savory dishes and peppermint for desserts. For a delicate mint taste in fruit salads, yogurt, or tea, try apple or orange mint. Mint lurks in the background in Middle Eastern salads, such as tabouli, and does well with lamb. It also goes with peas, zucchini, fresh beans, marinades for summer vegetables, cold soups, fruit salads, and cheese.
See our recipe for a delicious (and healthy) Mango Mint Smoothie!
mint_ice_cubes_full_width.jpg http://www.almanac.com/plant/mint?trk_msg=2KI2GAJJ31I411RFGH9GAQTM3C&trk_contact=EEBLFVJ2I0VAQT9EM5JFVJAK9O&trk_sid=5I5H89RDJ2TTKUD3L9M1OCG7H0&utm_source=Listrak&utm_medium=Email&utm_term=Mint+(title)&utm_campaign=Companion+Daily
Friday, June 9, 2017

Grow Wisteria In A Pot All The Tips And Tricks

Grow Wisteria In A Pot All The Tips And Tricks

Wisteria is a beautiful flowering plant that has traditionally been grown in China and Japan for over one thousand years.
The blooms are most commonly a deep mauve or purple but other shades right down from a pale pink to a pure white are available too. It’s surprisingly easy to grow and very hardy despite the delicate beauty of the flowers and the blooms have a lovely fragrance. Make sure you start off your Wisteria with a live plant as if you use seeds it will take around ten to fifteen years to bloom instead of three years.http://thewhoot.com.au/whoot-news/diy/grow-wisteria-in-a-pot?omhide=true

Zinnia Flower Varieties: Colorful, Easy, Fast-Growing!

Zinnia Flower Varieties: Colorful, Easy, Fast-Growing!

No summer garden is complete without colorful zinnias. Is there an easier or faster flower to grow? Sprinkle them in full sun and you’ll have seedlings in days!
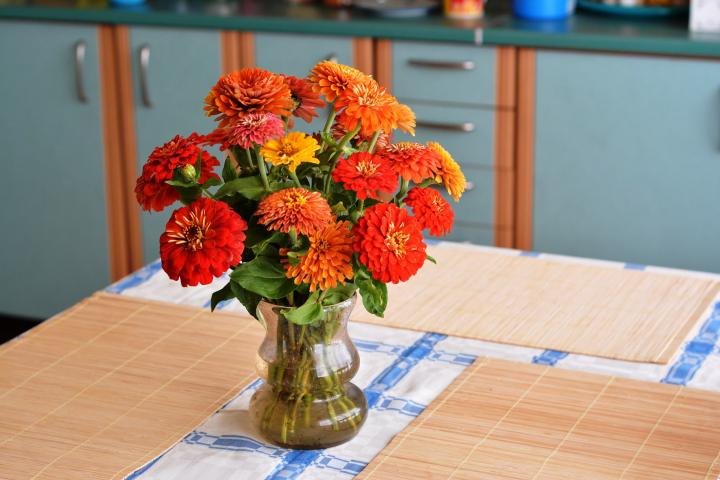
While there are many flowers that may be more elegant, zinnias rank high in “happiness factor.” Nothing gladdens the heart quite like a bouquet of cheerful, crayon-colored zinnias.
Plus, they’ll thrive during the long hot days of summer, when other flowers have given up, and continue to flower profusely until frost finally kills them in the fall. Heat- and drought-resistant, they keep branching willingly so the more you cut them to share with friends and family, the more flowers you will have. Talk about a hard-working flower!
bouquet-883279_1920_full_width.jpg
According to the Association of Specialty Cut Flower Growers, zinnias are one of the best flowers for the cutting garden because of their bright colors, strong stems, and long vase-life.

Varieties of Zinnia Flowers

Zinnias come in a wide range of heights, flower forms, and every color except blue. There is even a green one called ‘Envy’.
The zinnias most commonly found in our gardens are Zinnia elegans which range in height from the tiny 6 inch tall ‘Thumbelina’ to the four foot tall plus ‘Benary’s Giants’. They can have semi-double, fully double, dahlia-like flowers, or ones with rolled, quill-like petals.
heirloom-387985_1280_full_width.jpg
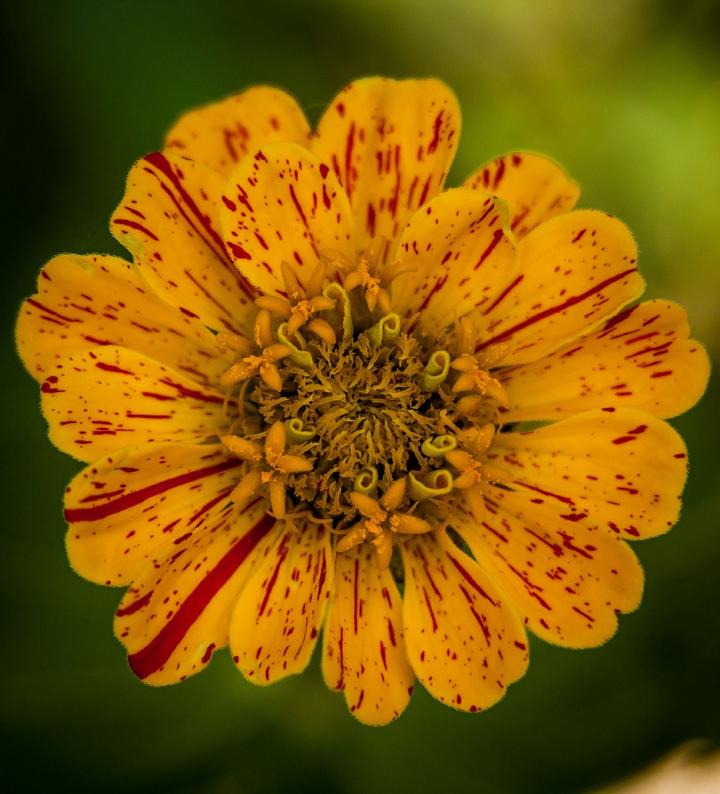
Varieties like ‘Peppermint Stick’ and ‘Candy Stripe’ are multi-colored.
flowers-978336_1280_full_width.jpg
AAS winner ‘Zowie Yellow Flame’ is an eye-popping gold with an iridescent magenta center.
Next up is Zinnia angustifolia, also called narrrow-leaf zinnia. It is a low-growing species with small golden yellow, white, or orange single flowers. AAS winner ‘Crystal White’ is only 8-10 inches tall making it popular for low front borders or for growing in hanging baskets, window boxes, and other containers. They are so heat and drought resistant that they are often planted in “hell strips”—the areas along parking lots, sidewalks, and roadways where full sun and extra heat radiating from the pavement fries most plants.
zinnias-600506_1920_full_width.jpg
Zinnia Profusion Cherry
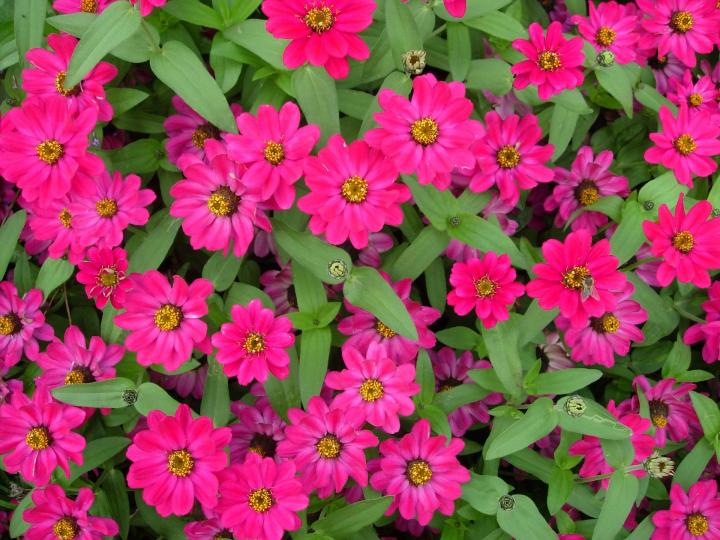
Hybrid zinnias in the Profusion series are a cross between elegans and angustifolia. Another AAS winning group of plants, they have the best traits of both parents - dazzling colors, continuous bloom, and heat, drought, and disease resistance. They grow 12 inches tall, are naturally branching, and form neat clumps covered with flowers.
Growing Zinnias
Zinnias are easy to grow from seed. Pick the sunniest spot you have, enrich the soil with a little compost, and sow the seeds about 1/2 inch deep. We’ve know folks who just sprinkle the seeds—and voila!
It’s not too late to start seeds in June. The seeds are large and have a high germination rate. Direct-seeded, they will catch up to transplanted ones and be in bloom in about 6 to 8 weeks.
They’ll sprout in 5 to 10 days. Thin them to stand about 9 to 12 inches apart. This is one plant you won’t have to fuss over. They are happy with an inch of water a week and need little additional fertilizing. Soon you’ll be picking armloads of flowers!
zinnia-59911_1920_full_width.jpg
Whether you are looking for an indestructible bedding plant, a tall hedge of flowers for cutting, or something in between, there are hundreds of zinnias to choose from. Since they are annuals, you are not “locked in” and every year you can try a new variety.
Read more on the Almanac’s Zinnia Plant Page.

About This Blog

Get inspired by Robin Sweetser's backyard gardening tips. Robin has been a contributor to The Old Farmer's Almanac and the All-Seasons Garden Guide for many years. She and her partner Tom have a small greenhouse business and also sell plants, cut flowers, and vegetables at their local Farmer's Market.

LadyBug Garden Tidbit Of The Month

LadyBug Garden Tidbit Of The Month

St.Lukes Indian Summer~Tidbit Of The Month

http://www.almanac.com/fact/st-lukes-little-summer-lovely-summerlike-days-saint
Lovely, summer like days that occur around October 18 are called Saint Luke’s Little Summer in honor of the saint’s feast day. Around this time, Saint Luke’s feast day, there is a period brief period of calm, dry weather. Of course, it’s difficult to generalize today across the vast continent of North America, but the temperature is usually mild and the leaf colors are turning a gorgeous color. It’s a good time for a brief vacation or visit to a park. In Venice, Italy, they say: “San Luca, El ton va te la zuca” (Pumpkins go stale on St Luke’s Day), but here in North America, pumpkins are enjoying their finest hour. Saint Luke is the patron saint of physicians and surgeons so it seems only fitting that the good doctor give us these calm days. In olden days, St. Luke’s Day did not receive as much attention in the secular world as St. John’s Day (June 24) and Michaelmas (September 29), so it was to keep from being forgotten that St. Luke presented us with some golden days to cherish before the coming of winter, or so the story goes. Some folks call this Indian Summer, but that officially occurs between November 11 and November 20.

When To Plant Mums

When To Plant Mums
Tip of the month

How To Make A Succulent Wreath

How To Make A Succulent Wreath
This turns Out So Pretty! Click on picture for directions

LadyBug Painted Rocks

LadyBug Painted Rocks
For Your Garden

Painted Garden Rocks

Learn to make these adorable ladybug painted rocks. use special outdoor paint for this adorable garden craft so you can keep garden ladybugs…

Ingredients

  • Patio Paint in colors of your choice (I used Larkspur Blue, Petunia Purple, Fiesta Yellow, Fuchsia, Citrus Green and Salmon)

  • Smooth rocks, preferably oval or round in shape

  • Paintbrush

  • Toothpick

  • Outdoor sealer or Patio Paint Clear Coat

Do It Yourself Projects

Do It Yourself Projects
Harvest~Autumn Costume

LadyBug Directions

Ladybugs are the one crawly creature most kids find fun, cute and friendly. Any child will feel the same wearing this simple, comfortable costume.

Materials Needed:

2 pieces (12 x 18 inches) stiff red felt
1 piece (12 x 18 inches) black felt
2 hook-and-loop stick-on buttons
2 large black chenille pipe cleaners
1 regular black pipe cleaner
1 square (12 inches) stick-on black felt
1 black headband
1 black turtleneck top
1 pair black leggings


Step 1

To make the ladybug's wings, draw a semicircle on each piece of stiff red felt. You can attach a 12-inch piece of string to a pencil and, holding the string end midway on the 18-inch side of the felt, draw a semicircle by swinging the pencil in an arc. Curve the top of each wing as shown at right.

Step 2

To make the yoke, fold the black felt piece in half lengthwise. At the center of the folded edge, cut a 5-inch, curved neck opening. Curve the outer edges of the yoke and cut the center open as shown in the photo.

Step 3

Attach the top of the wings to the back of the yoke with glue or needle and thread. Add hook-and-loop buttons to either side of the yoke opening. Sew or glue the large chenille pipe cleaners to the outside joints between the yoke and the wings: these are the bug's extra legs.

Step 4

Use a glass to trace 7 black dots on the stick-on black felt. Cut out the dots and stick them to the ladybug wings as shown in the photo.

Step 5

Glue the center of the regular black pipe cleaner to the center of the headband. Reinforce it with a strip of black stick-on felt. Curl ends of pipe cleaner to complete the antennae.

Step 6

Dress the child in the black turtleneck, leggings, wings with yoke and headband.


Cute Harvest Costume

Cute Harvest Costume
Click on photo for directions

LADYBUG PHOTO'S

LADYBUG PHOTO'S

LadyBug Recipe Today

LadyBug Recipe Today
I love to search, find, share recipes to cook,bake and serve.