
Hello

A magical place
Saturday, November 26, 2016
Monday, November 21, 2016
Planting Tulips and Violas & A Little Christmas Table Shopping
Welcome to the 408th Metamorphosis Monday!
Yesterday I cut and brought in the last of the Limelight Hydrangea blossoms. Can you believe this hydrangea was still producing new blooms! The temps have been dipping toward the freezing point each night, so I knew these last few flowers were about to be gone.
Limelight Hydrangeas truly are amazing, giving blooms throughout summer all the way into fall. Can’t recommend this plant enough, if you find it will grow in your zone.
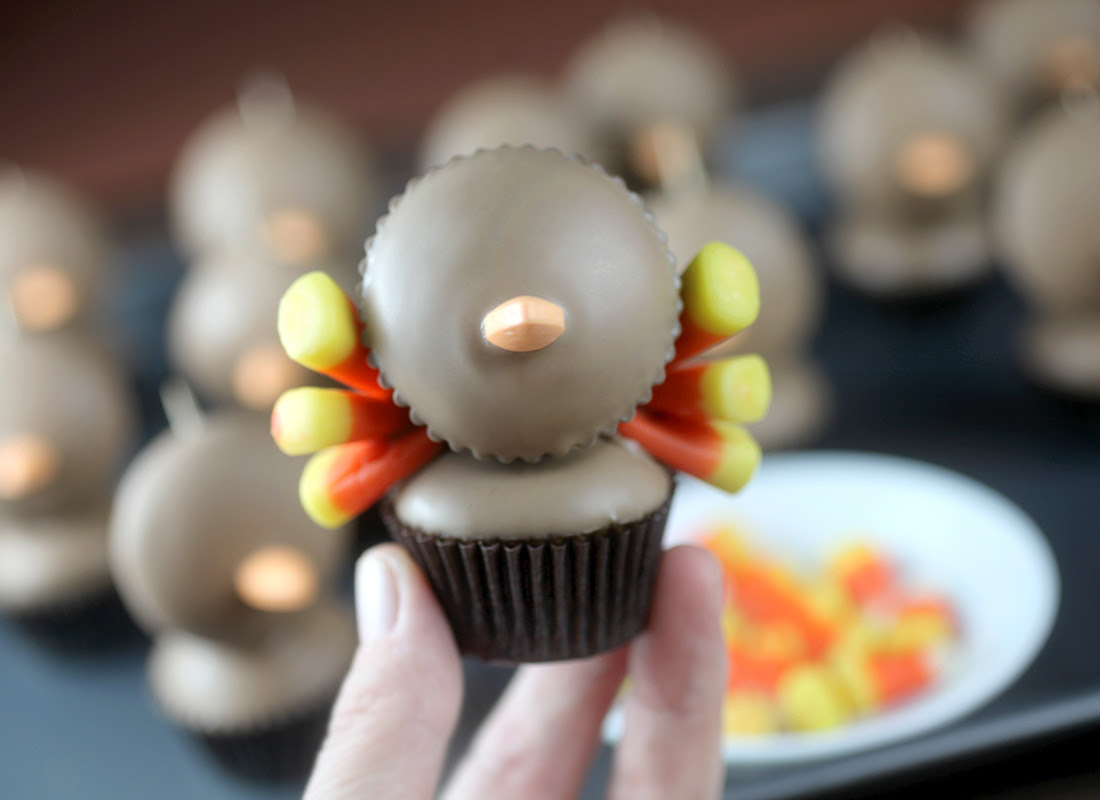
Little Gobblers
 http://www.bakerella.com/little-gobblers/?utm_source=feedburner&utm_medium=email&utm_campaign=Feed%3A+Bakerella+%28Bakerella%29
How cute are these tiny turkeys for Thanksgiving? They’re two-bite mini cupcakes dipped in candy coating and a fun treat to decorate for fall.

You can use this recipe to make 48 mini chocolate cupcakes. You’ll need two cupcakes for each little turkey.
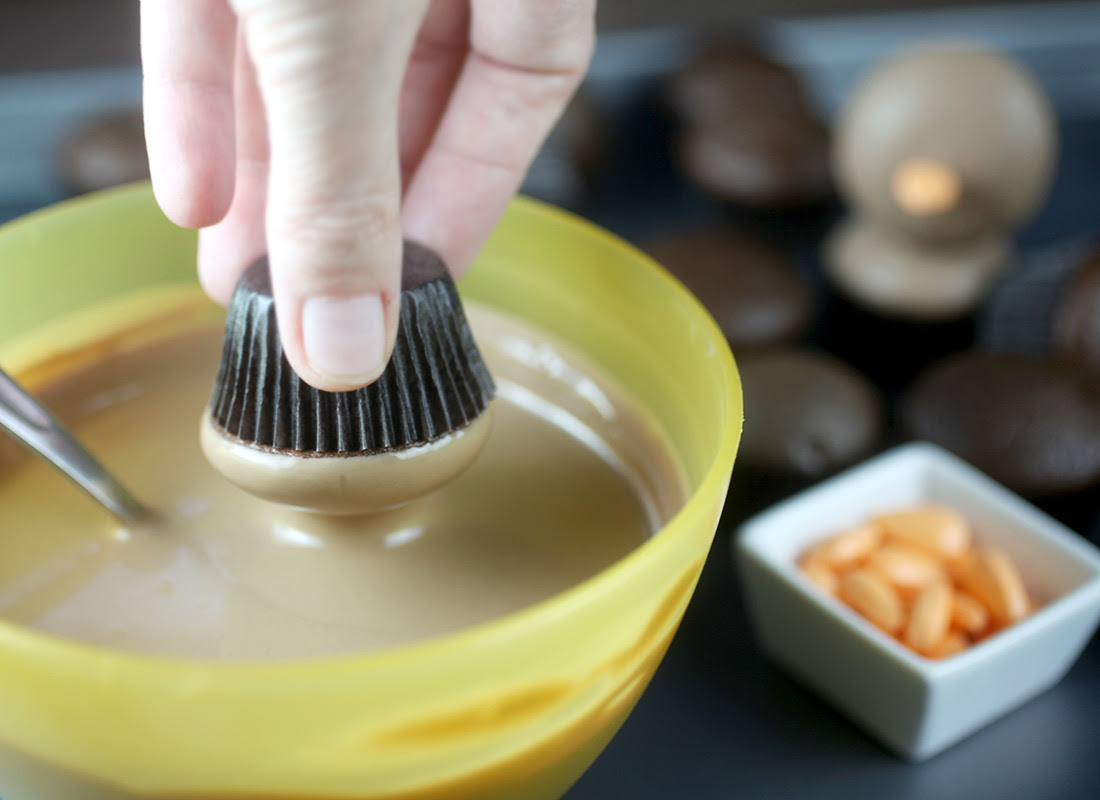
To get started decorating, dip a mini cupcake in melted chocolate candy coating. (Note: I lightened the chocolate by adding some white and yellow candy wafers, but you can just leave them dark brown also.)

While the coating is still wet, place an orange candy in position for a beak.
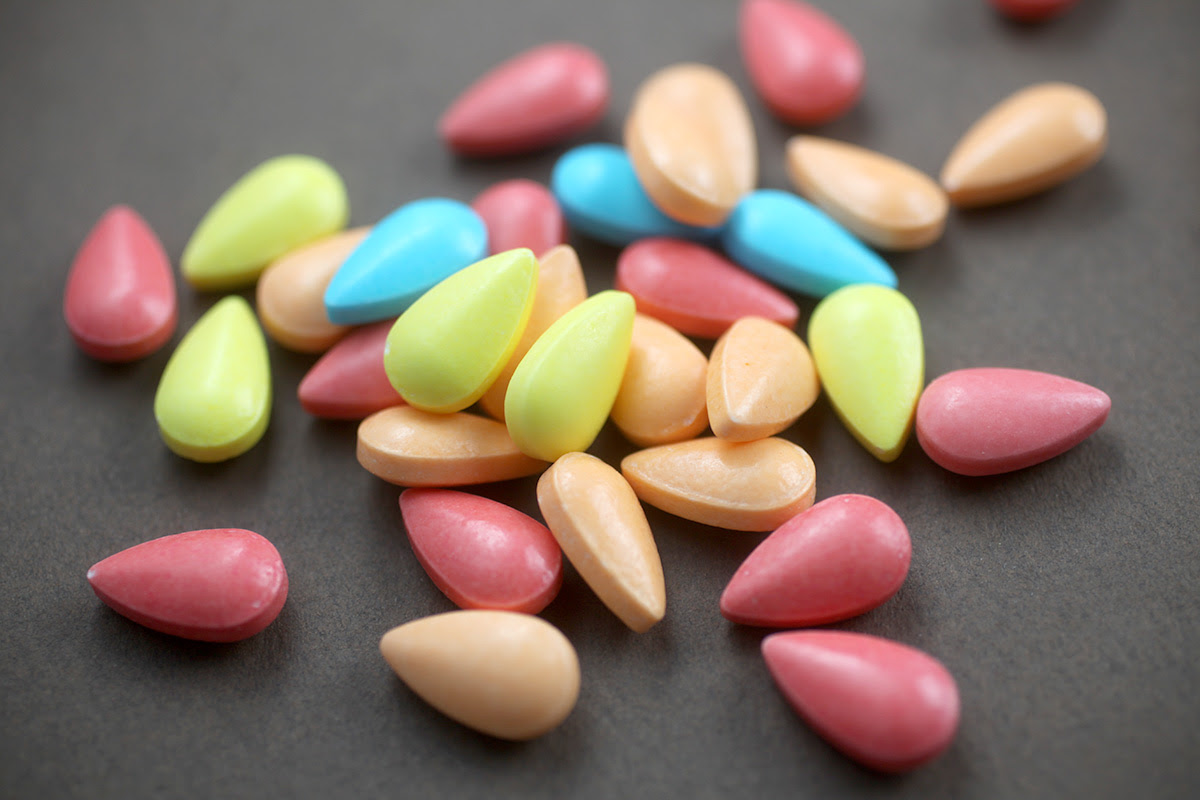
I used these Baby Tear Drop candies and they were a pretty nice size.
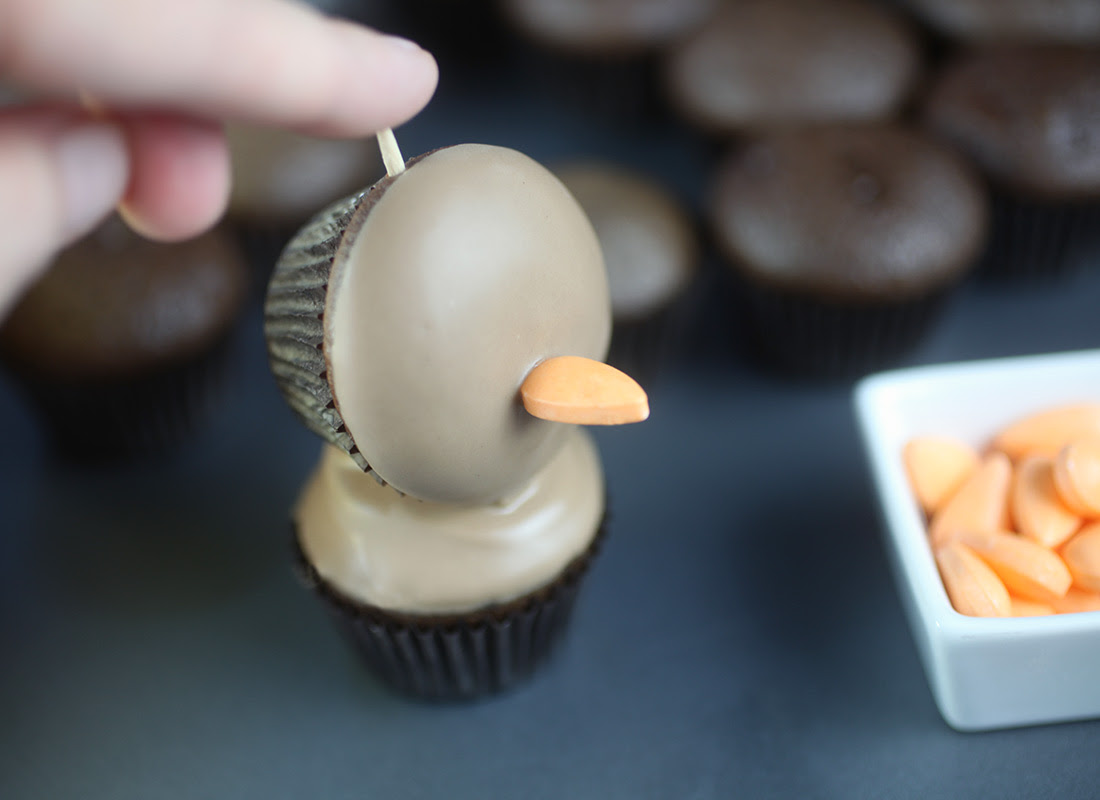
Insert a toothpick through the head when dry. Then place it gently on top of a second cupcake dipped in candy coating while still wet. Push toothpick through to secure and let the two cupcakes dry together.
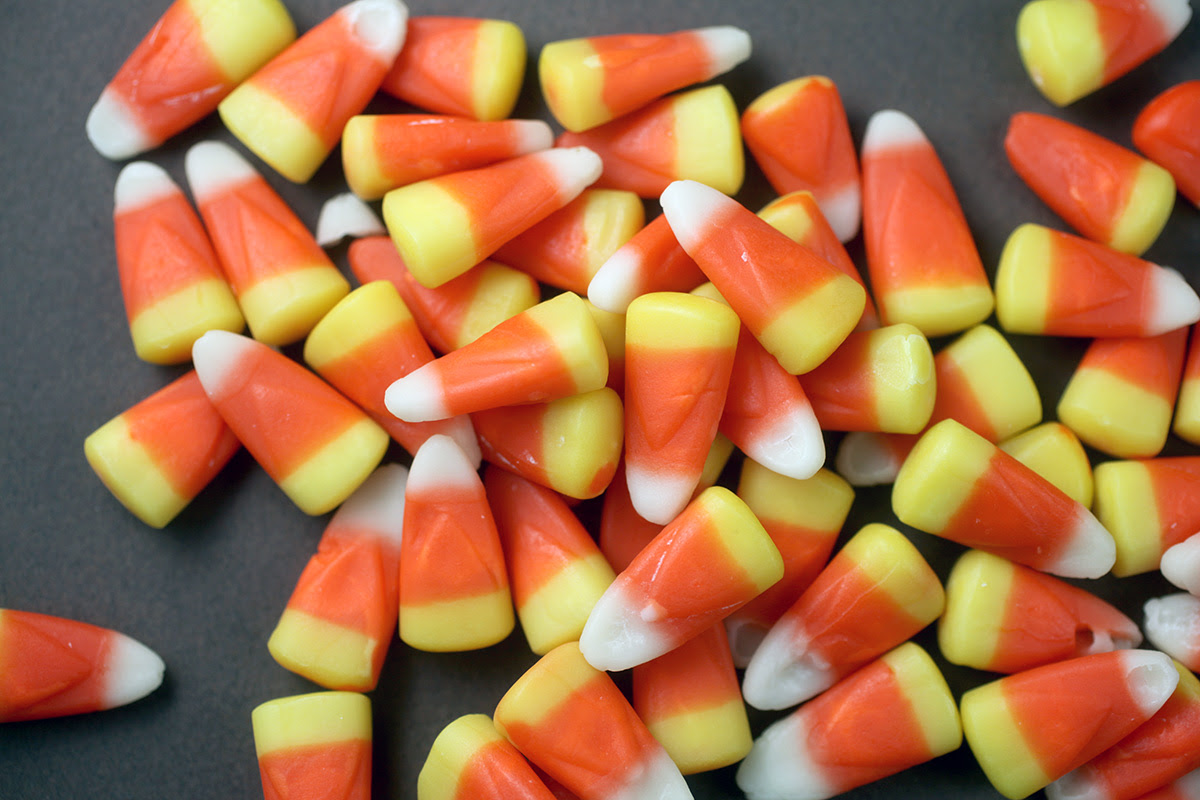
Candy corn… pretty much always a good choice for tail feathers this time of year.
Attach them to the side/back of the cupcakes with melted candy coating. They’re is really only enough room for three on each side unless you attach to the back of the top cupcake. When dry, gently twist and remove the toothpick that was inserted in the head.
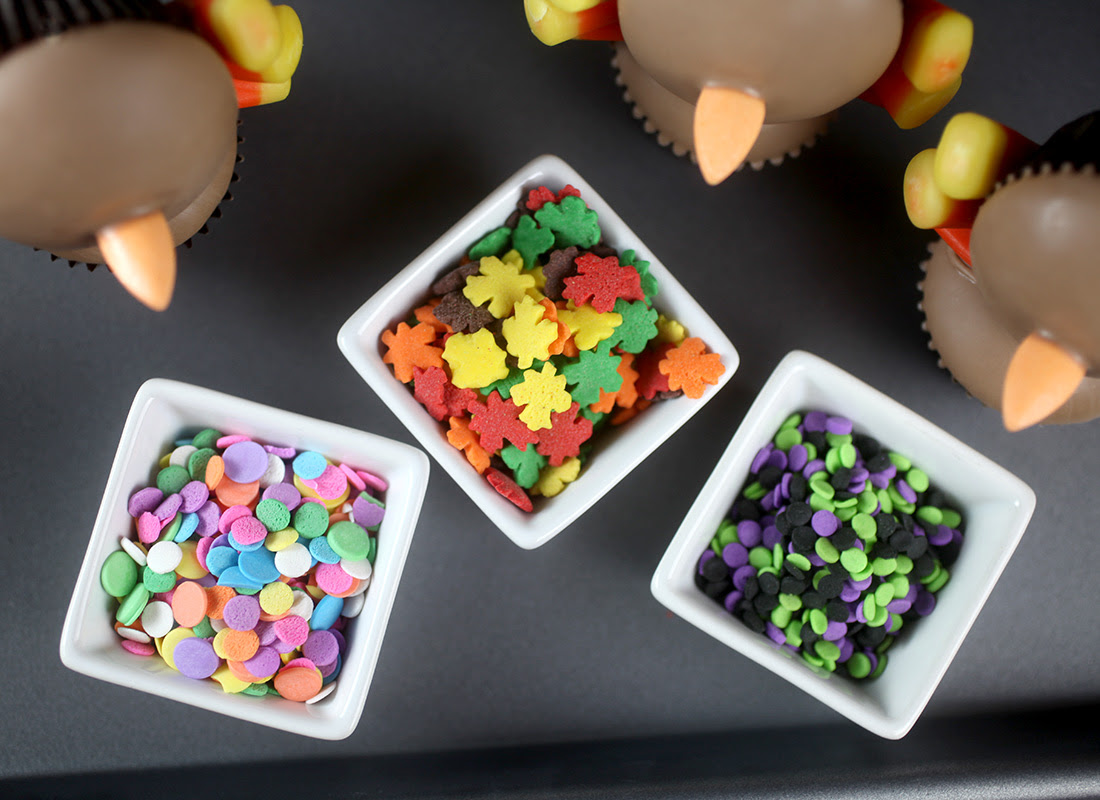
Okay, now for the faces.
Use pastel confetti sprinkles for pink cheeks and orange sprinkles to add to the bottom of the beak. Use black confetti sprinkles for eyes and red leaf sprinkles or something similarly sized for the wattle. Attach them with melted candy coating.
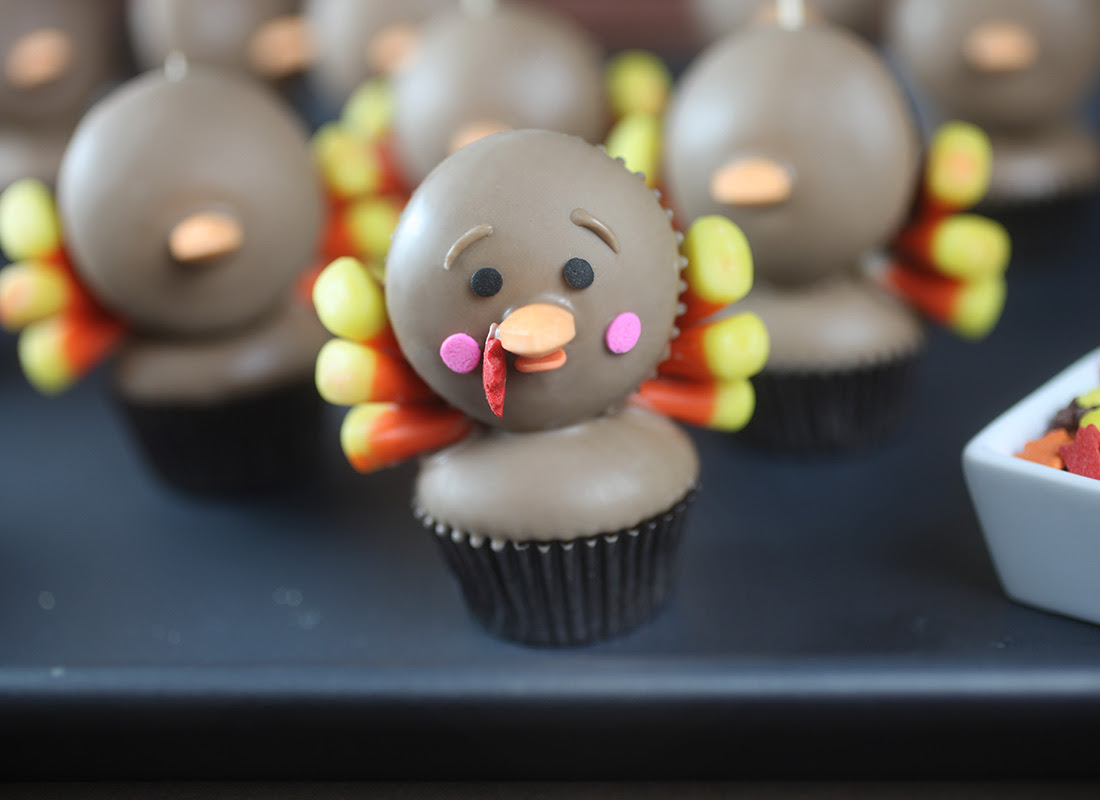
Then draw on eyebrows using a toothpick dipped in melted coating. Too cute. Now you can stop here…
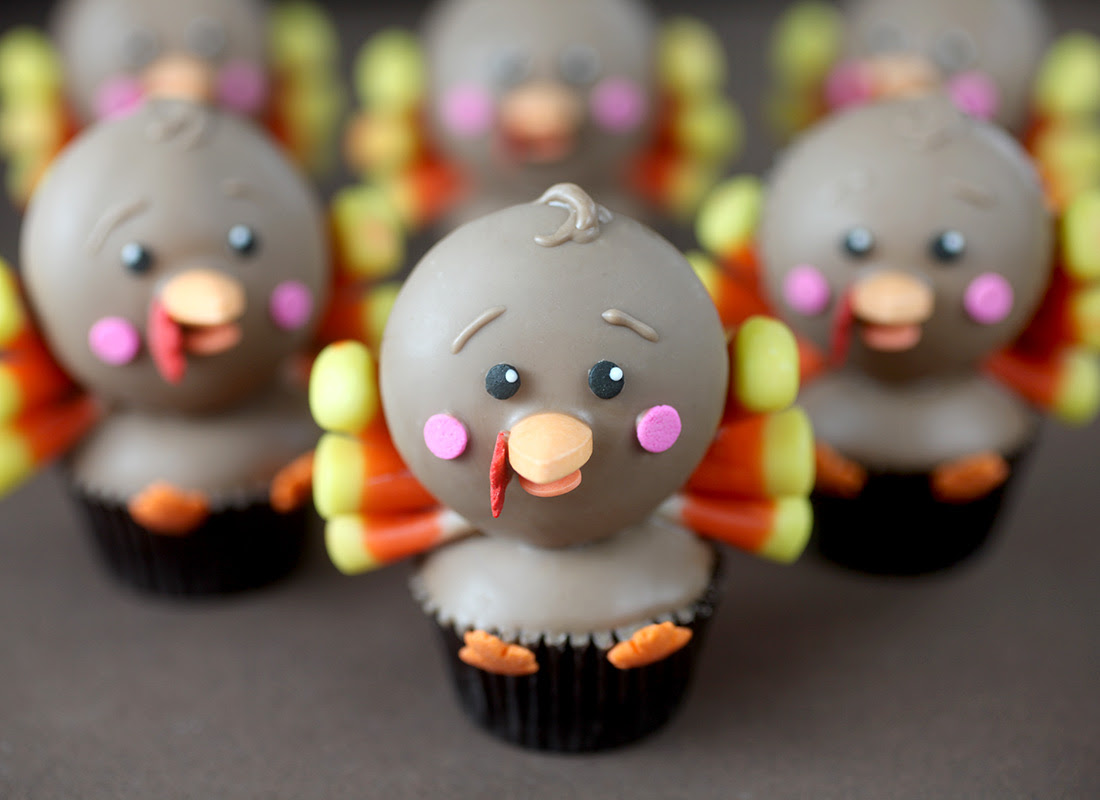
…But faces are always cuter when you can dot the eyes with white candy coating. It just brings their little faces to life.
And since I had already used the leaf sprinkles, I thought I’d use them for little feet, too!
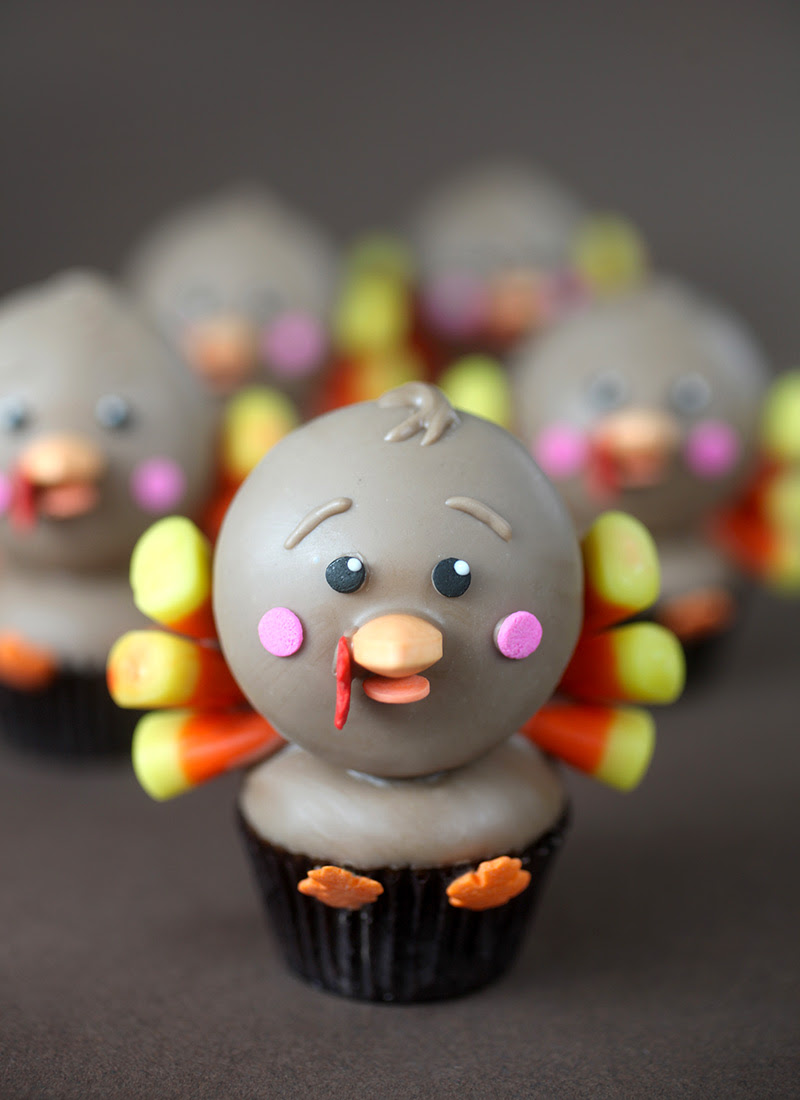
Hope these little gobblers bring you a smile.
Hugs and have a Happy Thanksgiving!!!!
CLAY POT HORSES
Clay Pot Horses The Cutest Collection To Make
|
 Here's
a cute weekend project you'll love. Add some personality to your yard
with these adorable Clay Pot Horses. We've included other cute animals
for you too so check them all out now!
Here's
a cute weekend project you'll love. Add some personality to your yard
with these adorable Clay Pot Horses. We've included other cute animals
for you too so check them all out now!


Sunday, November 20, 2016


Friday, November 18, 2016
LadyBug Cakes 3
IMPORTANT NOTICE!!!
We don’t sell any cakes, we just offer ideas how to decorate your own
cakes, cupcakes and other desserts. Thank you for your visit!
http://bigfatcook.com/tipsntricks/foodydoo/ladybug-cakes/


LadyBug Cake Ideas
Here is a collection of adorable ladybug cakes and decorating ideas, so
if you are trying to make a similar cake, decorated with fondant, then
don’t miss these creative ladybug cakes!


Ladybug Birthday Cake
Ladybug Birthday Cake
 http://bakingdecorations.com/decorating/ladybug-birthday-cake/

Thursday, November 17, 2016


Tuesday, November 15, 2016
LadyBug Cookies

Ingredients
- 1
- package (16 oz) Pillsbury™ Ready To Bake!™ refrigerated sugar cookies (24 cookies)
- 1
- container (12 oz) fluffy white whipped ready-to-spread frosting
- 12
- Mini Rolls™ Betty Crocker™ Fruit Roll-Ups® Strawberry Craze™ chewy fruit snack (from 6.6-oz box)
- 24
- small round chocolate-covered creamy mints
- Small white heart-shaped candy decors
- Black string licorice, cut into 48 (1/2-inch) pieces
- Large colored heart-shaped candy decors
Steps
Sunday, November 13, 2016

Friday, November 11, 2016
Gardening In December Tips
Gardening To Do List - December in the Garden
Regional Gardening Guide for December
Many of us do more shopping and planning for our gardens during the winter months than actual gardening but that doesn't mean there's nothing to do. In the warmer zones, December is the start of pleasant weather and a chance to enjoy planting cool season vegetables and flowers that don't tolerate your summers. Northern gardeners should use this period without leaves to scout for egg masses and other signs of trouble on trees and shrubs. Here are some more regional gardening tips for the beginning of winter.
 http://gardening.about.com/od/winterinthegarden/a/DecGarden.htm
Many of us do more shopping and planning for our gardens during the winter months than actual gardening but that doesn't mean there's nothing to do. In the warmer zones, December is the start of pleasant weather and a chance to enjoy planting cool season vegetables and flowers that don't tolerate your summers. Northern gardeners should use this period without leaves to scout for egg masses and other signs of trouble on trees and shrubs. Here are some more regional gardening tips for the beginning of winter.
In General
- Keep watering your holiday plants and give them plenty of light.
- Check houseplants and any plants you brought indoors for the winter, for insects that may have hitched a ride. With the heat on, they can multiply quickly.
- Also check any bulbs, corms, tubers and bare root plants for dessication or rot.
- Start eating those stored vegetables and think about planting more winter squash next year.


Thursday, November 10, 2016

Sunday, November 6, 2016
THANKSGIVING WEATHER FOLKLORE
Thanksgiving Weather Folklore
- If the geese on St. Martin’s Day (November 11) stand on ice, they will walk in mud at Christmas.
- If the first snow sticks to the trees, it foretells a bountiful harvest.
- If sheep feed facing downhill, watch for a snowstorm.
- If on All Saints Day the beech acorn is dry, we will stick behind the stove in winter, but if it is wet and not light the winter will not be dry, but wet.
- Thunder in November indicates a fertile year to come.
- If there be ice in November that will bear a duck, there will be nothing thereafter but sleet and muck.
- As November 21st, so the winter.
- When the winter is early, it will not be late. THESE ARE SOMETHING FOR FUN AND NO TAKEN SERIOUS AT ALL.


Saturday, November 5, 2016
Bowling Ball LadyBugs


Tuesday, November 1, 2016
12 Lovely Ladybug Crafts for Kids
12 Lovely Ladybug Crafts for Kids
 http://iheartcraftythings.com/12-lovely-ladybug-crafts-for-kids.html

REMINDER ~ DON'T FORGET!

Why is There Daylight Saving Time?
Here’s the short history of this phenomenon …Credit for Daylight Saving Time belongs to Benjamin Franklin, who first suggested the idea in 1784. The idea was revived in 1907, when William Willett, an Englishman, proposed a similar system in the pamphlet The Waste of Daylight.
The Germans were the first to officially adopt the light-extending system in 1915 as a fuel-saving measure during World War I. The British switched one year later, and the United States followed in 1918, when Congress passed the Standard Time Act, which established our time zones. This experiment lasted only until 1920, when the law was repealed due to opposition from dairy farmers (cows don’t pay attention to clocks).
During World War II, Daylight Saving Time was imposed once again (this time year-round) to save fuel. Since then, Daylight Saving Time has been used on and off, with different start and end dates. Currently, Daylight Saving Time begins at 2:00 A.M. on the second Sunday of March and ends at 2:00 A.M. on the first Sunday in November. http://www.almanac.com/content/when-daylight-saving-time-2016?trk_msg=04GCP5LT4NTKLFTRP6MPPIC910&trk_contact=EEBLFVJ2I0VAQT9EM5JFVJAK9O&utm_source=Listrak&utm_medium=Email&utm_term=When+is+Daylight+Saving+Time+2016%3f+(read+more)&utm_campaign=Companion+Daily
Subscribe to:
Posts (Atom)
LadyBug Garden Tidbit Of The Month

When To Plant Mums

Tip of the month
How To Make A Succulent Wreath

This turns Out So Pretty! Click on picture for directions
LadyBug Painted Rocks

For Your Garden
Do It Yourself Projects

Harvest~Autumn Costume
Cute Harvest Costume

Click on photo for directions
LADYBUG PHOTO'S

LadyBug Recipe Today

I love to search, find, share recipes to cook,bake and serve.